
Arrangement described below was performed on a virtual server with Centos and installed panel Vesta Control Panel. That is, we had a clean server, but with the already installed Apache, PHP and so on, which have been established together with the control panel. In principle, if to the server would be running another panel, such as ISPmanager, you are setting RadioCMS does not change.
The first thing you need to install to the server module php libssh2. Without it RadioCMS fail. How to install php libssh2 on Centos server is described in detail in this article.
Next, we need immediately set for a package to avoid any errors during installation of necessary software:
yum install libxslt libxslt-devel libogg-devel libvorbis libvorbis-devel taglib taglib-devel libshout libshout-devel lame lame-devel
Now you need to install Icecast. The new version via yum put strongly discouraged because it may cause problems. Put a stable version of the source code:
wget http://downloads.xiph.org/releases/icecast/icecast-2.3.3.tar.gz
tar zxvf icecast-2.3.3.tar.gz
cd icecast-2.3.3
./configure
make
make install
Add user and group:
groupadd icecast
useradd -g icecast -d /home/icecast -s /sbin/nologin icecast
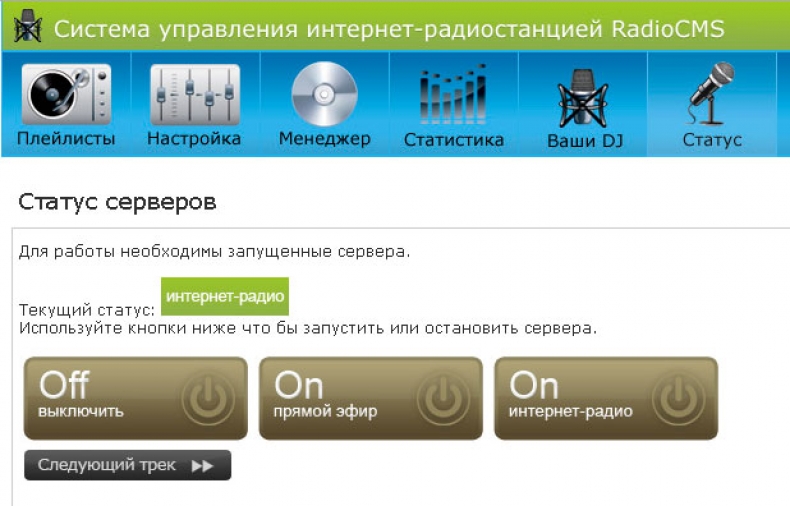
Pay attention! Run icecast server service is not necessary, it will run through the interface RadioCMS.
Now create the config icecast, And not in the standard location, location etc, and in the other. Create a folder /usr/icecast/, and in her file icecast.xml with the following contents:
<icecast>

<limits>
<clients>200</clients>
<sources>4</sources>
<threadpool>5</threadpool>
<queue-size>524288</queue-size>
<client-timeout>30</client-timeout>
<header-timeout>15</header-timeout>
<source-timeout>10</source-timeout>
<burst-on-connect>1</burst-on-connect>
<burst-size>65535</burst-size>
</limits>

<authentication>
<source-password>password</source-password>
<relay-password>password</relay-password>
<admin-user>admin</admin-user>
<admin-password>password</admin-password>
</authentication>
<hostname>ip-server</hostname>

<listen-socket>
<port>8000</port>
</listen-socket>
<fileserve>1</fileserve>

<mount>
<mount-name>/live</mount-name>
<charset>UTF-8</charset>
<fallback-mount>/play</fallback-mount>
<fallback-override>1</fallback-override>
<fallback-when-full>1</fallback-when-full>
</mount>

<mount>
<mount-name>/play</mount-name>
<charset>UTF-8</charset>
</mount>

<paths>
<logdir>/usr/local/share/icecast/logs</logdir>
<webroot>/usr/local/share/icecast/web</webroot>
<adminroot>/usr/local/share/icecast/admin</adminroot>
<alias source="/" dest="/status.xsl"/>
</paths>

<logging>
<accesslog>access.log</accesslog>
<errorlog>error.log</errorlog>
<loglevel>3</loglevel>
<logsize>10000</logsize>
</logging>

<security>
<chroot>0</chroot>
<changeowner>
<user>icecast</user>
<group>icecast</group>
</changeowner>
</security>

</icecast>
In this config need 3 times to set a password and specify the ip address of your server.
Now you need to create a folder for logs /usr/local/share/icecast/logs, because it does not exist and assign the folder user and group icecast.
Check the working capacity. In the console, type in the cmdlet to run icecast
icecast -c /usr/icecast/icecast.xml
Open the browser address http://your_ip:8000/
If you open the Icecast Status, then everything is ok, if nothing happened, then port 8000 is closed in iptables and need to open it. For this file /etc/sysconfig/iptables add a line
-A INPUT -p tcp -m tcp --dport 8000 -j ACCEPT
and restart the iptables command
service iptables restart
Again run in the console command to run icecast and open in a browser http://your_ip:8000/ - due to open Icecast Status.
Next, you need to install ezstream. Not need to install the official version, and a special, site RadioCMS, since the use of the official will be a problem.
wget http://radiocms.ru/files/ezstream-0.5.6-radiocms-2.4.tar.gz
tar zxvf ezstream-0.5.6-radiocms-2.4.tar.gz
cd ezstream-0.5.6-radiocms-2.4
./configure
make
make install
In the folder /usr/icecast/ (where we are icecast config) create a playlist file playlist.txt, set it chmod 777, as well as create a config file ezstream - ezstream.xml, with the following contents:
<ezstream>
<url>http://localhost:8000/play</url>
<sourcepassword>password source in the config icecast</sourcepassword>
<format>MP3</format>
<filename>/full/address/to/playlist</filename>
<shuffle>0</shuffle>
<playlist_program>0</playlist_program>
<svrinfoname>Name</svrinfoname>
<svrinfourl>http://radiocms.ru/</svrinfourl>
<svrinfogenre>Ofther</svrinfogenre>
<svrinfodescription>Description</svrinfodescription>
<svrinfobitrate>128</svrinfobitrate>
<svrinfochannels>2</svrinfochannels>
<svrinfosamplerate>44100</svrinfosamplerate>
<svrinfopublic>1</svrinfopublic>
<reencode>
<enable>1</enable>
<encdec>
<format>MP3</format>
<match>.mp3</match>
<decode>lame -f --preset cbr 128 --bitwidth 16 "@T@" -</decode>
</encdec>
</reencode>
</ezstream>
We enter the password that you specified in the config file in the source icecast, the path to the playlist, in this case /usr/icecast/playlist.txt, change the name of our radio station, website address, and a description of the genre.
At this preparatory process is complete, you can create a subdomain, for example radio.yourdomain.ru and set back RadioCMS.
Installation is very simple, the only moments that need to pay attention:
- Should not be open_basedir directive
- During installation, you specify the correct path to the config files and playlists that we are in a folder /usr/icecast/
You will also need to specify the username and password Super Admin server, ie root. This is necessary in order to run the server could RadioCMS Icecast. However, indicate your current username and password superadmin not highly recommend, it is better to create a new root with a very complicated password and specify them when you install RadioCMS. Add root to your control panel, if it allows it, or through console commands:
useradd -ou 0 -g 0 radiouser
passwd radiouser
where radiouser - this username and password you set after entering the second command.
After installation, you must add the cron command specified in the last step.
At this, in principle, everything is left in music folder create a new folder, pour the music (eg by ftp), then in the admin area to create a new playlist RadioCMS, set the time of its launch, add to the playlist and the music you want to start broadcasting.
Address your radio playlist can be found at radio.yourdomain.ru:8000/live.m3u
Stream radio.yourdomain.ru:8000/live
If you need help installing the necessary software and RadioCMS - you can apply to our experts. The cost of services is only 10 $.
We are also ready to provide you rent a virtual server on which you can install RadioCMS. The cost starts at $ 5 per month. For more information, please contact our Customer Support.


